Showing posts with label Decorative Label. Show all posts

Friday, May 31, 2013

Thanks so Much with Daisy

Greetings!
Here I am again, playing with Midnight Muse and Pool Party!  This card has been sitting on my work station for over a month…  I play around with things, add them, take them away, change them around… but I keep coming back to a simple layout.  I think it’s time to just slap my label on the back and snap it’s picture!
Thanks so Much
And…. a close-up of the daisy.Thanks so Much (1)
Thanks for stopping by!
Blessings and Inky Hugs;
~Shawnie B.
Shawnie@CardsByShawnie.com

Wednesday, April 24, 2013

Thanks so Much–Freshly Made Sketch Challenge

Greetings!  I saw this sketch challenge from Freshly Made Sketches and I just knew it was going to be a fun one for me to complete.
This card was created with:
Stamp Set: Watercolor Trio
Punch/s:  Butterfly Builder and Decorative Label
Extra’s:  Ribbon, Crochet Lace, and paper 3-D rose
Thanks so Much - Freshly Made Sketches Challenge

Thanks for stopping by!
Blessings and Inky Hugs;
~Shawnie B.

Thursday, February 21, 2013

Get Well Soon Doily

Greetings!
This card is a CASE that was inspired by Susan Carlson.  It makes for a great Get Well Soon card.  The colors are soft & soothing.  Hopefully it’ll bring a smile to someone who is sick or recovering from surgery.
This is also a sketch challenge entry for the Sweet Sunday Sketch Challenge. 
Items used to create this card: 
  • Hello, Doily
  • Field Flowers
  • Sincere Salutations
  • Seam Binding
  • Brads
  • Decorative Label punch
Get Well Soon Doily
Get Well Soon Doily (1)
Sweet Sunday Sketch Challenge
Thanks for stopping by!
Blessings & Inky Hugs;
~Shawnie B.

Tuesday, February 12, 2013

Teal Thanks

Greetings Stampers!  I absolutely LOVE Taken with Teal and it disappoints me that the color was discontinued.  I really wish I had the money at the time and I would have stocked up on the discontinued color and others.  Sigh…  There is the chance, though that the color may come back in the future as an “in color”.  Who knows!

This card was inspired by Sandi MacIver at Stamping with Sandi.  She is truly a creative genius as far as I’m concerned.   She’s one of my favorites that I go to when I’m looking for my Mojo.

This card was created using the following tools / supplies:

  • Bigz Beautiful Butterflies die
  • Embosslits Beautiful Wings
  • Four Frames Stamp Set
  • Just Believe Stamp Set
  • Style Beautiful (background on label)
  • Halfback Pearls
  • Linen Thread
  • Decorative Label Punch
  • Dimensionals

Teal Thanks

Only half of the butterflies are adhered to the card, I was working on the image of them looking like they were fluttering and flying off the card.Teal Thanks 2

Here is a close-up of the sentiment.  I used one of the stamps from Style Beautiful as a background on the sentiment tag.  It’s hard to see in the picture, but it’s there.  Teal Thanks 3

Thanks for stopping by!

Blessings & Inky Hugs;

~Shawnie B.

Saturday, January 21, 2012

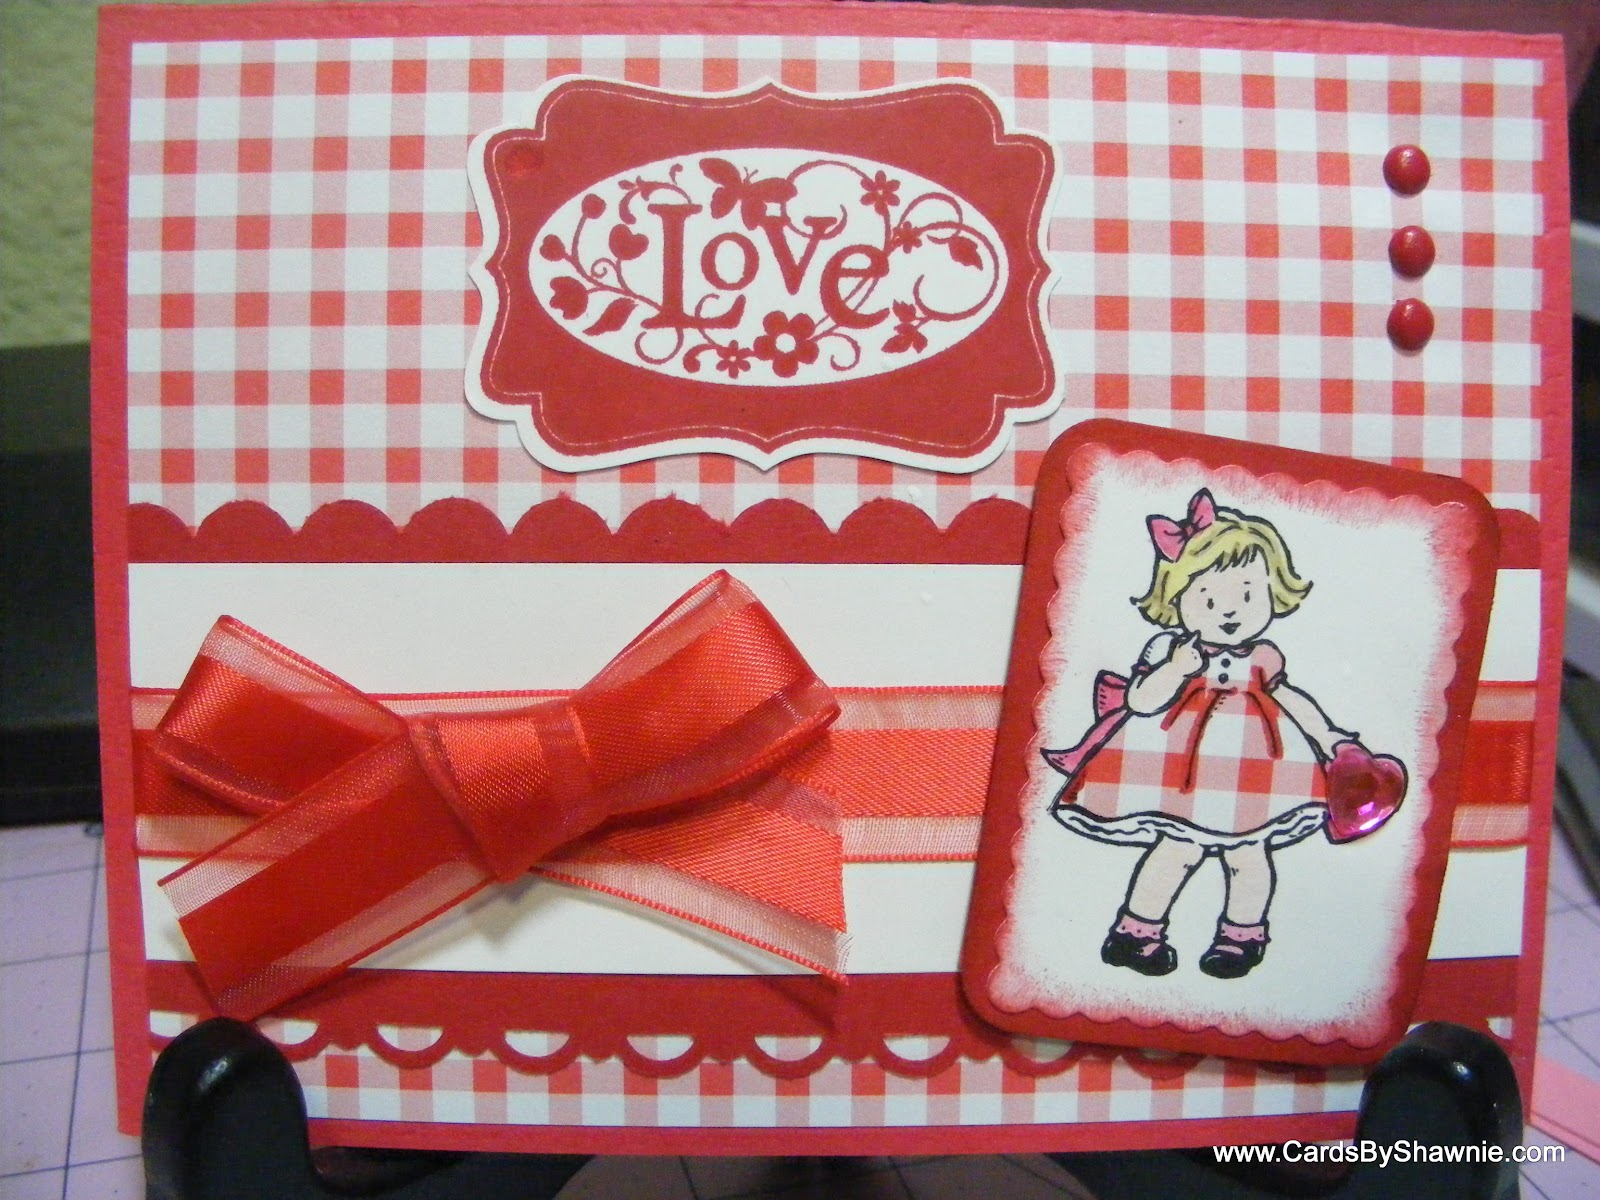
More Fun with Greeting Card Kids


Happy Saturday!

Bill and the kids all went fishing and target practicing today, so instead of going with them, I thought I would use this opportunity to have some uninterrupted crafting time to myself. 


To get the little girls dress to match the background design I stamped the image on the cardstock and cut the dress out.  Then I stamped the image on Whisper White cardstock and adhered the cut out dress over the stamped image on white.  I believe this is called Paper Piecing. 

I just love  the Greeting Card Kids stamp set.  The children are darling and the images are versatile, they can be used for many different cards.


 Goodies used to create this card:
  • Greeting Card Kids stamp set
  • You are Loved stamp set
  • Brads
  • Clearlits Scalloped Rectangle Die
  • Corner Rounder Punch
  • Decorative Label Punch
  • Scallop Border Punch
  • Scallop Trim Border Punch
  • Ribbon
  • Watercolor Wonder Crayons


Thank you all for stopping by! 

Blessings & Inky Hugs;

~Shawnie B.

Friday, September 2, 2011

Baskets Full of Fun

Here is a cute Swing Card I learned to watch on YouTube .  I'm not sure what the lady's name is, but her user name is .  So, anyway, this is my version of the card.  There are a lot of tutorials out there for this type of card, but this lady has the simplest / cleanest & less confusing format's I had seen.  A lot of stampers get nervous in front of the camera & do a lot of ummm's & uhhhh's. 

I have included several pictures so you can get a better idea of what the card looks like & how it works.  


This style of card would display nicely on someone's desk.  Because the focal point on the card is a basket of yarn, I thought I would decorate the rest of the card with Sweetest Buttons from my Embosslits Die that both cut's and embosses with the Big Shot. 

Thank you for dropping by, have a blessed day!

~Shawnie B

Tuesday, May 24, 2011

Birthday Celebrations

I have a lot of Birthday cards, but most of them are foo foo cards with pretties all over them.  I was running low on cards for every day or for men so I figured since I was in the mood, I'd better get some whipped out.  My Mojo for that only lasted for one card.  Sigh... beggers can't be choosers.  I need to listen and remember to go by my own advise.  Keep it simple.  I get myself all worried about embellishments, accents, extra's, etc... so much to the point where nothing is on the card at all!

Yeah, you don't want to be inside my head.  Trust me!

Items used for this card:
Stamp Set/s:  Upsy Daisy,  Happy Day, and Background Basics
Cardstock:  Tempting Turquoise, Bermuda Bay, Peach Parfait, Whisper White, and generic designer paper I had in my stash.
Ink Colors Used:  VersaMark (for embossing Powder), Cherry Cobbler, Bermuda Bay (inside sentiment)
Goodies used:  Punches:  Decorative Label, Scallop circle, circle.
Nesties Lacey Circle Die, Cupcake Embellishment, Glitter, Black embossing powder, Green Grossgrain ribon, Brad, Crop-a-dile, Big Shot, Circles Cuddlebug Embossing Folder


Feel free to leave a comment on this project. Remember if you are kind enough to add yourself as a follower on my blog, I will do the same for you as well. Please just let me know your website.

God Bless you and thanks for stopping by!!
Inky Hugs
~Shawnie Bartron
Remember, if you’re not covered in ink, you’re not stampin'!
Visit my online Stampin' Up! store 24-7. Click on "Shop Now" http://Shawnie.StampinUp.net

Saturday, May 14, 2011

Floral Thanks

Greetings friends & fellow stampers!

This card was put together using the Baby Blossoms, Four Frames, and So Happy for You stamp set's from Stampin' Up!  I also used various punches:  tiny flower punch from the Itty Bitty Shapes Punch Pack, Modern Label Extra Large Punch for the Daffodil Delight cardstock with brass eyelet's punched through each end and hemp knotted and adorning for an embellishment.  I thought about using ribbon, but there's already enough foo foo going on ;) you will rarely hear me say that as usually there can NEVER be enough foo foo, this case was an exception.  And lastly I used the Decorative Label Punch around the Flower Frame that is holding the sentiment.  I love the stamp set's that match with the punches!  It makes it so easy to get everything to jive together, don't you think? 

Any-who...  Lastly I used my Square Lattice Embossing Folder with my Big Shot to emboss the whole thing with the exception of the strip across, which has no embossing to bring focus to the 2 bouquets, the sentiment in the middle, and flower petals on each end. 

oh, I colored the frame with my Stampin' Write markers so each item was detailed with it's own color.  frame is bravo burgundy, flowers are Regal Rose, and leaves and stems are Pear Pizzazz.

And to position the flowers perfectly with the different colors, I used my Stamp-a-ma-jig, which is used for 2 way stamping.  (I made a video with instructions on how to use your Stamp-a-ma-jig, it's on You Tube if you are interested in learning) ")


So, there you have it!  I would also like to announce that I will be displaying my Upline's cards on the Fancie Kats Gallery.  An Upline is the person who signed me up for Stampin' Up! as a Demonstrator.  I'm here downline.  Once I have my team gathered and growing, I will be someone's Upline.  Oh yeah, let me know if you would like to be on my Stampin' Up! team.  You can join as a Demonstrator to either supplement your addiction / hobby with a big discount or you can do it to earn income.  Whatever your goals or motivations are, I will support and encourage them all the way!  Let me know if you are interested!

Until next time folks.  Take care of yourself.... and each other!

Feel free to leave a comment on this project. Remember if you are kind enough to add yourself as a follower on my blog, I will do the same for you as well. Please just let me know your website.

God Bless you and thanks for stopping by!!
Inky Hugs
~Shawnie Bartron
Remember, if you’re not covered in ink, you’re not stampin'!
Visit my online Stampin' Up! store 24-7. Click on "Shop Now" http://Shawnie.StampinUp.net

Friday, May 6, 2011

Priceless

New announcement --- This card was recognized/featured on Kelly's Blog Finds of the Day!!! on May 9th.  Please be sure to visit her website to see other blogs with projects she recommends!
 
Good afternoon!  I hope the weather where you are is as warm, sunny, & and cheerful as it is here!  Bill & I had Bug, our grand baby over for a few days and I've been crafting here and there when I can.  It's been so long since we've had him over I couldn't tear myself away from him but he's taking a nap right now so I"m taking advantage of the moment!  
Ingredients for making this card:
  • Stamp Set - Priceless
  • Punch - Decorative Label
  • Embossing Folder - Elegant Lines
  • Embossing Powder - Iridescent
  • Seam Binding
  
I look forward to seeing your comments!
God Bless you and thanks for stopping by!!
Inky Hugs
~Shawnie Bartron
Remember, if you're not covered in ink, you're not stampin'!
Visit my online Stampin' Up! store 24-7. Click on "Shop Now" http://Shawnie.StampinUp.net

Saturday, April 30, 2011

A is for Adorable

Good Morning! 

Thought I would share a card a did a while back when I was in a black & white mood. 


Goodies used to make this card:
  • Bigz Top Note Die
  • Punch - Curly Label
  • Punch - Decorative Label
  • Stamp Set - A is for Adorable
  • Stamp Set - Zoofari
  • Grommet
  • Ribbon
  • Stampin' Write Marker
To create this card I used the Top Note die to cut the Whisper White and the Zebra print design paper and cut the Whisper White cardstock shape in half.  

Using the Adorable stamp I stamped on Whisper White with Basic Black ink. Punched out the image with my Curly Label punch & then punched the basic black cardstock with my Decorative Label punch.

Using Basic Black ink I stamped the zebra image from the Zoofari stamp set on the half top note Whisper White piece.  

Tied the Basic Black ribbon around the zebra print Top Note piece and then punched the Grommet through the ribbon and cardstock.  Once everything was adhered correctly I attached it to the card base. 


I look forward to seeing your comments!
God Bless you and thanks for stopping by!!

Inky Hugs
~Shawnie Bartron

Remember, if you’re not covered in ink, you’re not stampin'!
Visit my online Stampin' Up! store 24-7. Click on "Shop Now" http://Shawnie.StampinUp.net

Related Posts Plugin for WordPress, Blogger...